Roman Bucket Construction

One of the things that has surprised me most while researching the history of coopering is just how little the basic construction of a bucket has changed over the last two thousand years.

Roman coopers had already mastered the essential principles of building a watertight vessel. Although every bucket wasn’t made exactly the same, archaeological finds show a remarkably consistent approach that would still be familiar to a medieval or Renaissance cooper.

Historical Finds

Archaeology has provided several fascinating glimpses into Roman coopering.

At Vindolanda in northern England, excavations have uncovered preserved wooden buckets and tubs. One of the famous writing tablets even mentions “Junius the cooper,” confirming that barrel and bucket making was already an established profession in Roman Britain.

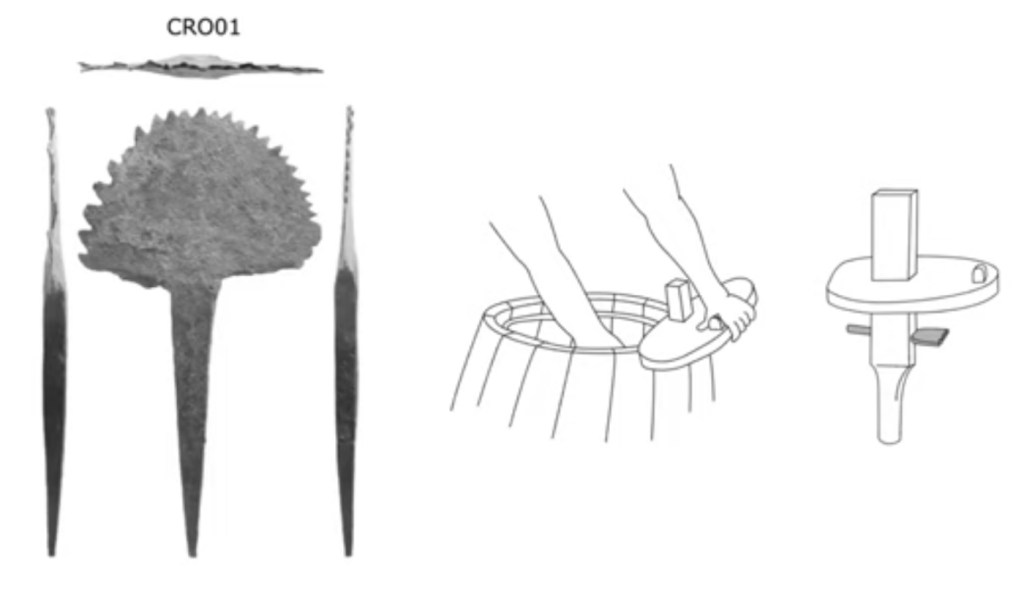
The Museum of London houses one of the largest collections of Roman woodworking tools. Among them is a rare croze iron—the specialized tool used to cut the groove inside the staves that holds the bucket’s wooden bottom in place.

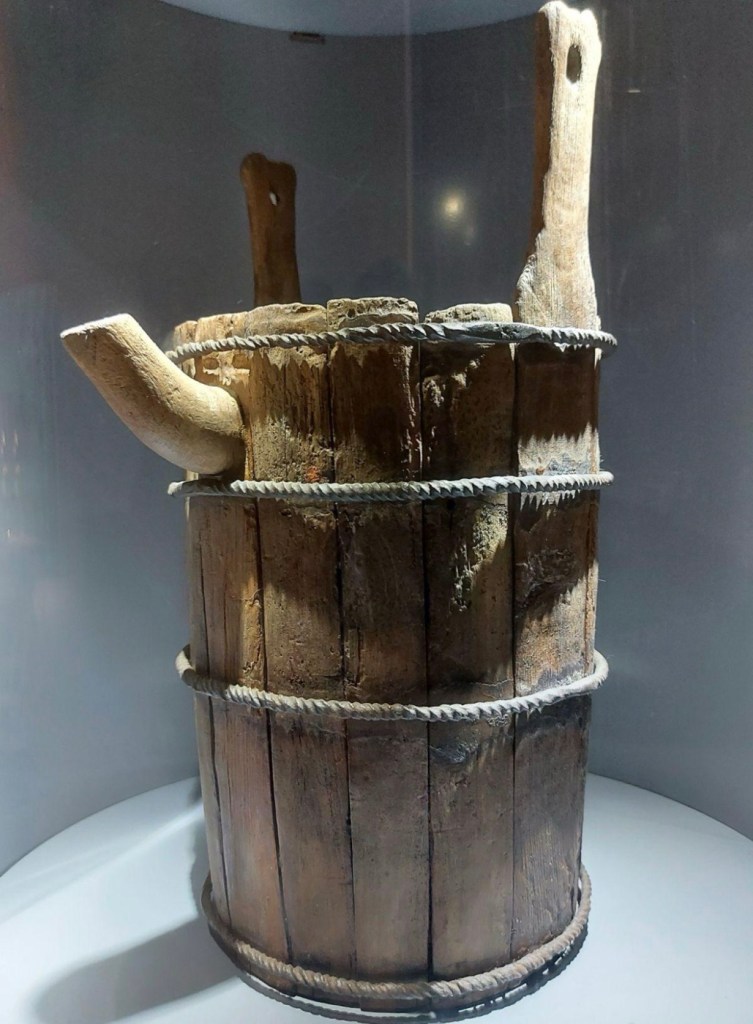
Near Utrecht in the Netherlands, archaeologists recovered an 1,800-year-old Roman ship from the Rhine River. Among its contents was a beautifully preserved wooden bucket fitted with a distinctive bronze pouring spout, demonstrating both the quality of Roman craftsmanship and the variety of vessels they produced.

Another important discovery came from Great Witcombe in England, where a large cache of Roman ironwork included many of the tools a cooper would recognize today: adzes, augers, dividers, gouges, and even bucket hoops.

The Roman Cooper’s Toolkit

Building a watertight bucket required more than just woodworking skills—it demanded specialized tools.

Roman coopers likely began by splitting logs radially with axes and adzes. Splitting the wood rather than sawing it preserved the natural grain, producing stronger, more watertight staves.

Frame saws were used where precise cuts were needed, while drawknives and planes shaped each stave so that every edge fit tightly against its neighbour.

Augers bored holes for handles or fittings, and dividers helped lay out accurate circles for the bucket’s bottom.

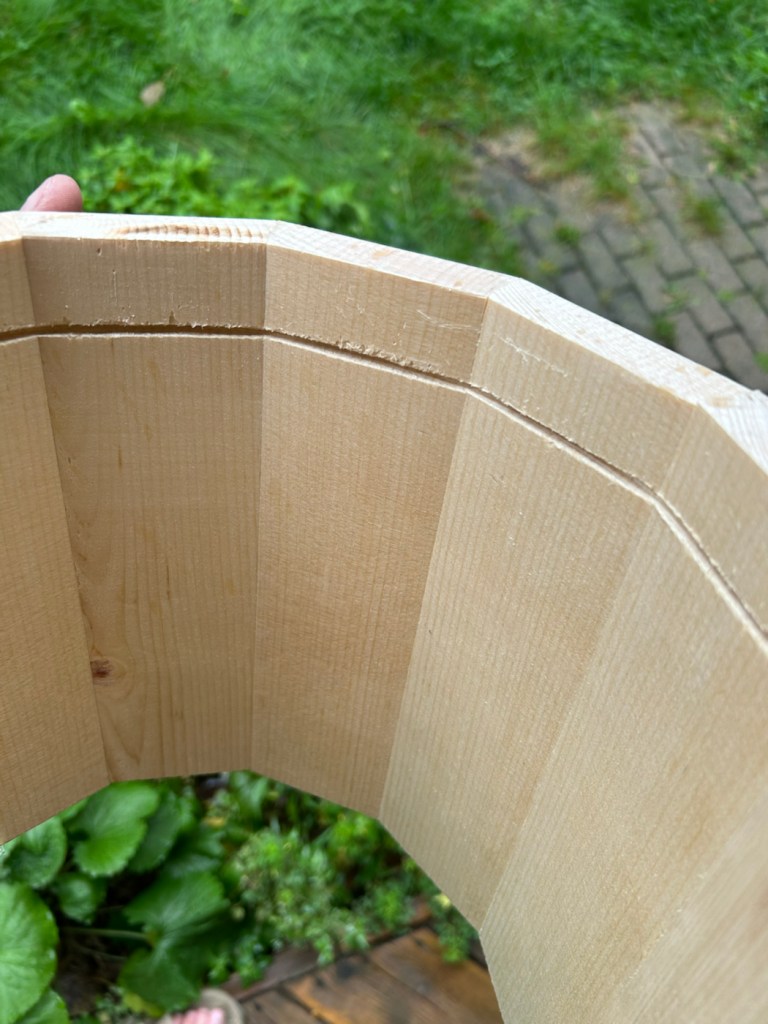
Perhaps the most recognizable tool was the croze iron, used to cut the groove around the inside of the assembled staves. This groove accepted the wooden bottom, locking it securely into place once the hoops were tightened.

Many of these tools remained largely unchanged for well over a thousand years.

How Roman Buckets Were Built

Most excavated Roman buckets share several common features.

They were generally nearly cylindrical, sometimes with a slight flare toward the rim, although a few examples have a more barrel-like profile. Their appearance was practical rather than decorative, built to withstand daily use.

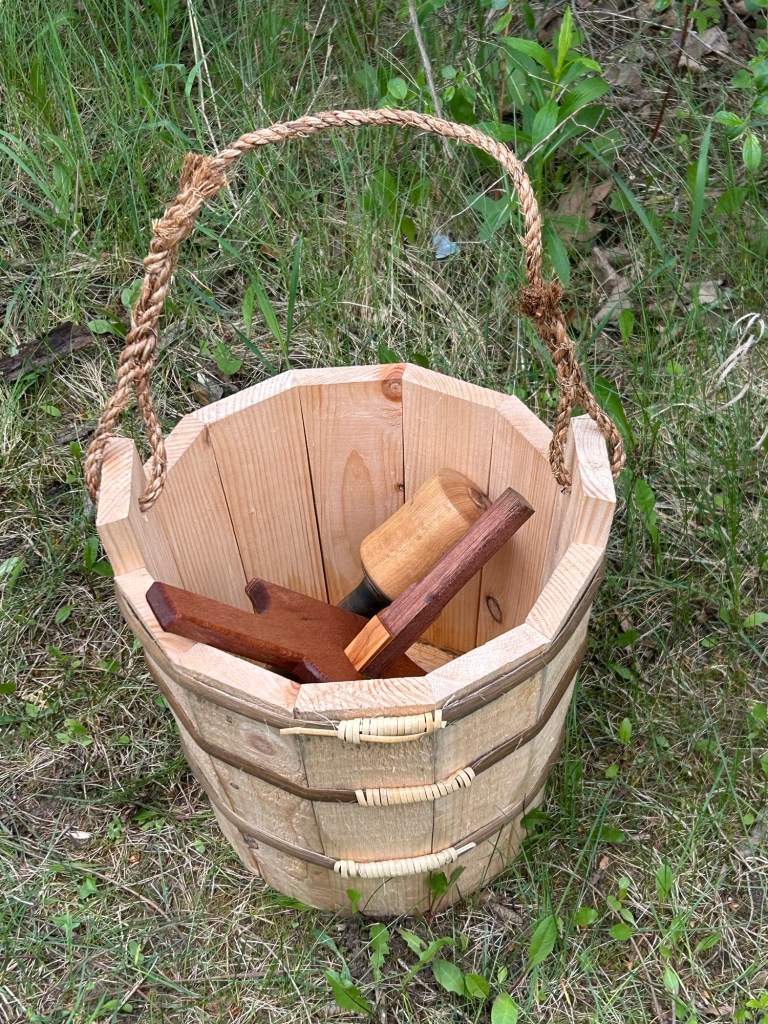
Handles varied depending on the bucket’s purpose. Some were fitted with iron bails attached to side lugs, while others used wooden ears with bent-wood handles. Simpler buckets occasionally relied on rope handles, particularly where metal fittings were unnecessary.

The buckets themselves were constructed from tapered split staves held together under compression by hoops. A wooden bottom was fitted into a crozed groove, creating a remarkably strong and watertight vessel without the use of glue.

Two Thousand Years of Proven Design

What fascinates me most is how little these fundamentals changed over time.

The same basic construction—split staves, a crozed bottom, and hoops holding everything together—continued through the Viking Age, the Middle Ages, the Renaissance, and into the era of traditional coopering.

For anyone learning the craft today, it’s humbling to realize that the techniques we practice in the workshop are built on methods that Roman coopers had already perfected nearly 2,000 years ago.

Sometimes the best designs don’t need reinventing—they simply stand the test of time.

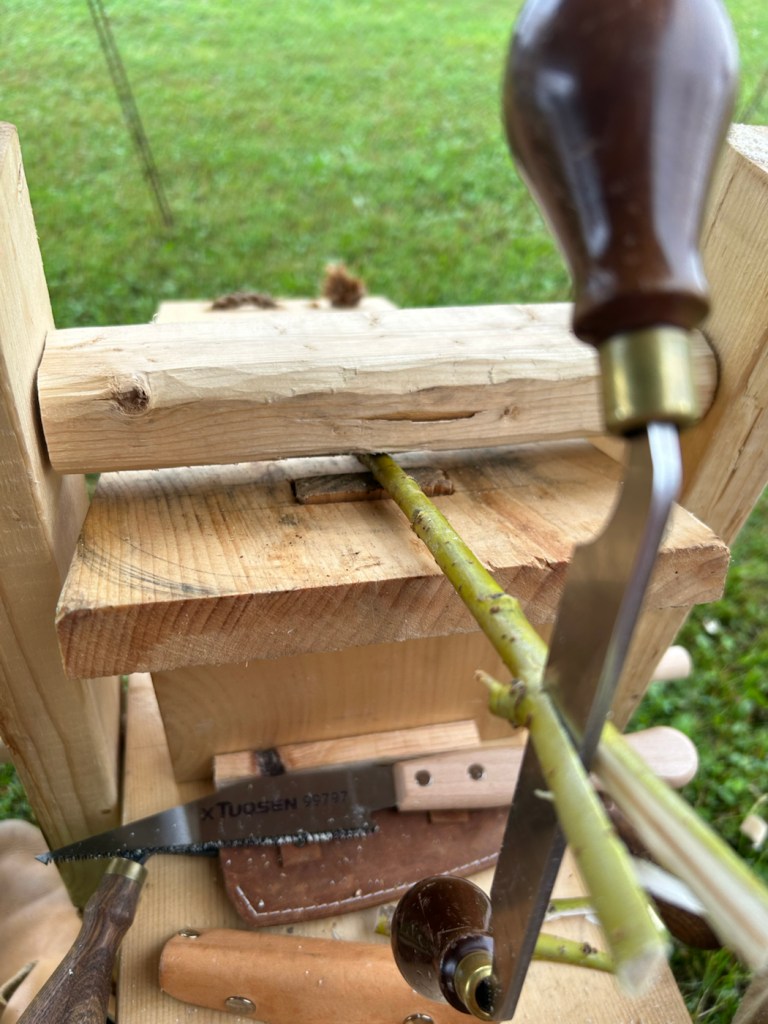
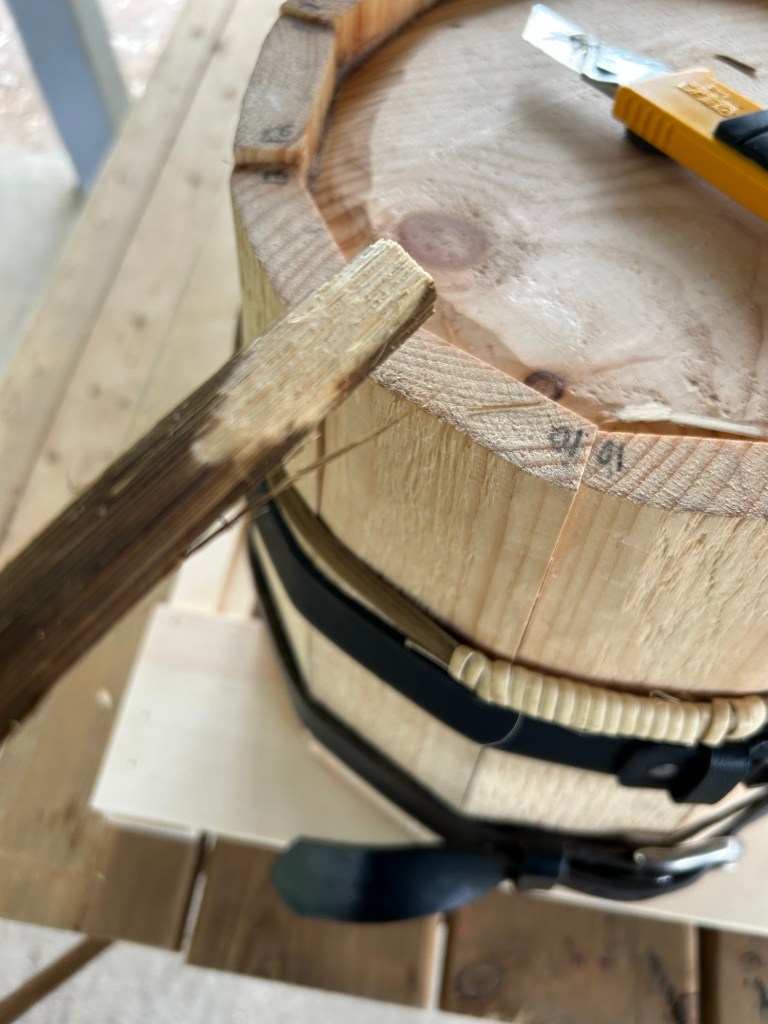
Splitting will branches for hoops

Learning to Make Traditional Willow Hoops

One of the biggest challenges I’ve faced while learning the craft of coopering isn’t shaping the staves or cutting the croze—it’s making the hoops that hold everything together.

Over the years I’ve experimented with just about every modern solution I could think of: embroidery hoops, oak hoops, metal strapping, leather belts, ratchet straps, and untapered steel hoops. They all work to some degree, but none truly capture the methods that historical coopers would have relied upon.

Popular media has led many people to believe that wooden buckets and barrels have always been bound with iron hoops. In reality, that’s only part of the story. Before iron hoops became widespread during the medieval period, coopers often relied on natural materials such as split willow, hazel, withies, or other flexible woods to bind buckets and casks together. These materials required considerable skill to prepare, but they were readily available and remarkably effective.

For finished buckets, I’ve occasionally used reed purchased from a chair caning supplier. It certainly looks the part, but I’ve found it lacks the strength needed during the actual construction process.

This past weekend, while attending an SCA event, I decided it was finally time to try making my own willow hoops.

Armed with green willow branches, I attempted to split them into long, flexible strips. I understood the theory, but quickly discovered that understanding a technique and having the proper tools are two very different things.

Although I managed to split several branches, this first attempt produced only short lengths—far too short to wrap around a bucket. Still, every unsuccessful attempt teaches something valuable. I’ll chalk this one up as another lesson on my journey as an apprentice cooper.

Reflecting on the experience afterward, I began thinking about what the ideal tool might look like.

My idea is surprisingly simple: a flat board secured in my shavehorse, with a sharp knife mounted upright in the center, the cutting edge facing away from me. By carefully starting a split in the end of a green willow rod, I could feed it over the knife and pull the branch toward myself, guiding each half with my hands as it naturally divides. If everything goes according to plan, each rod should split into two long, usable lengths suitable for hoop making.

As it turns out, this isn’t a new idea at all.

Historical research shows that this traditional process is known as skeining, and the specialized tool used is called a willow splitter. Like so many traditional woodworking techniques, generations of craftspeople had already solved the problem centuries before I encountered it.

Now I have two new projects ahead of me: build a proper willow splitter and practice the art of skeining until I can consistently produce long, strong hoops.

Sometimes the greatest lesson isn’t that a method doesn’t work—it’s discovering why skilled craftspeople developed specialized tools in the first place.

Every failed attempt brings me one step closer to understanding the craft.

Stave Math

Figuring Out Stave Measurements & Bucket Diameter

You know how teachers always said, “You’ll need this math one day”… and most of us thought, “Yeah, not likely.”

Well… here I am, wishing I had paid a bit more attention.

If I had a blue police box from Doctor Who, I’d probably go back and sit through those geometry lessons a little more carefully.

Because it turns out—coopering is math.

The Challenge

When building a bucket, everything depends on geometry:

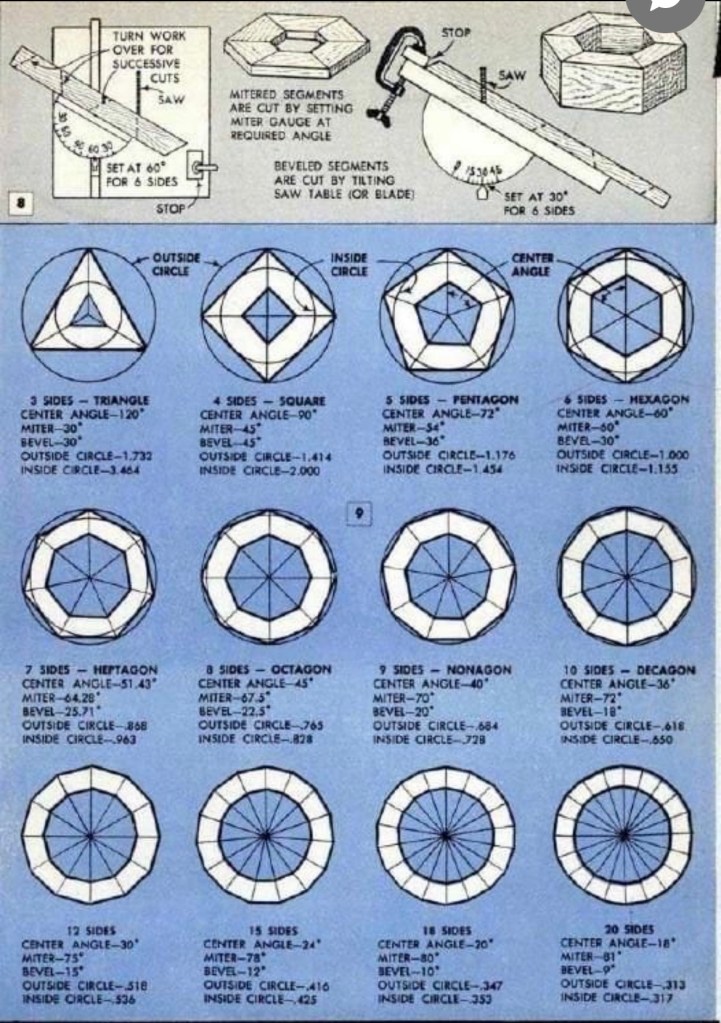
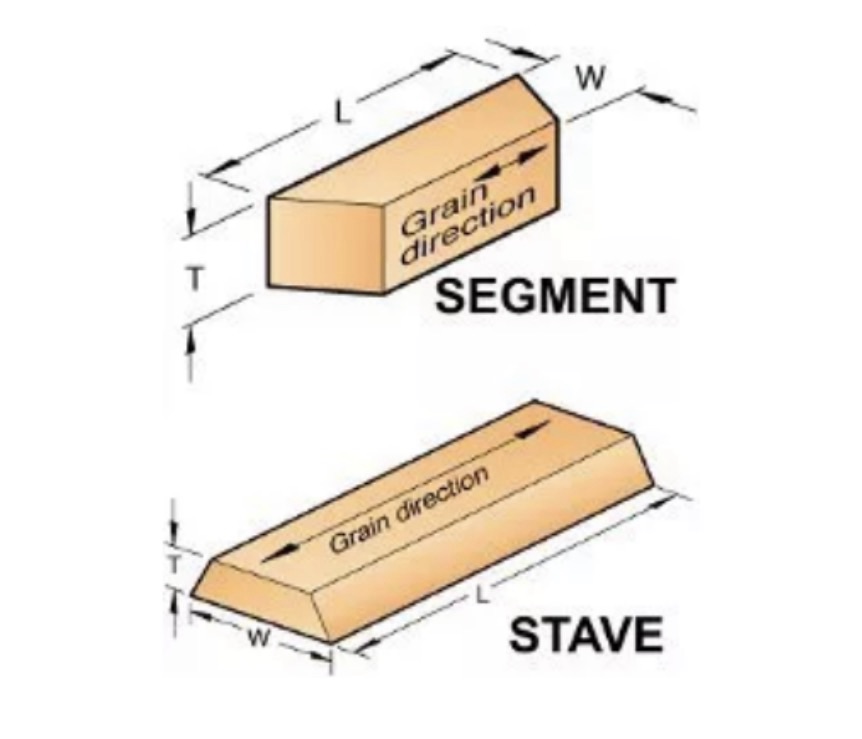
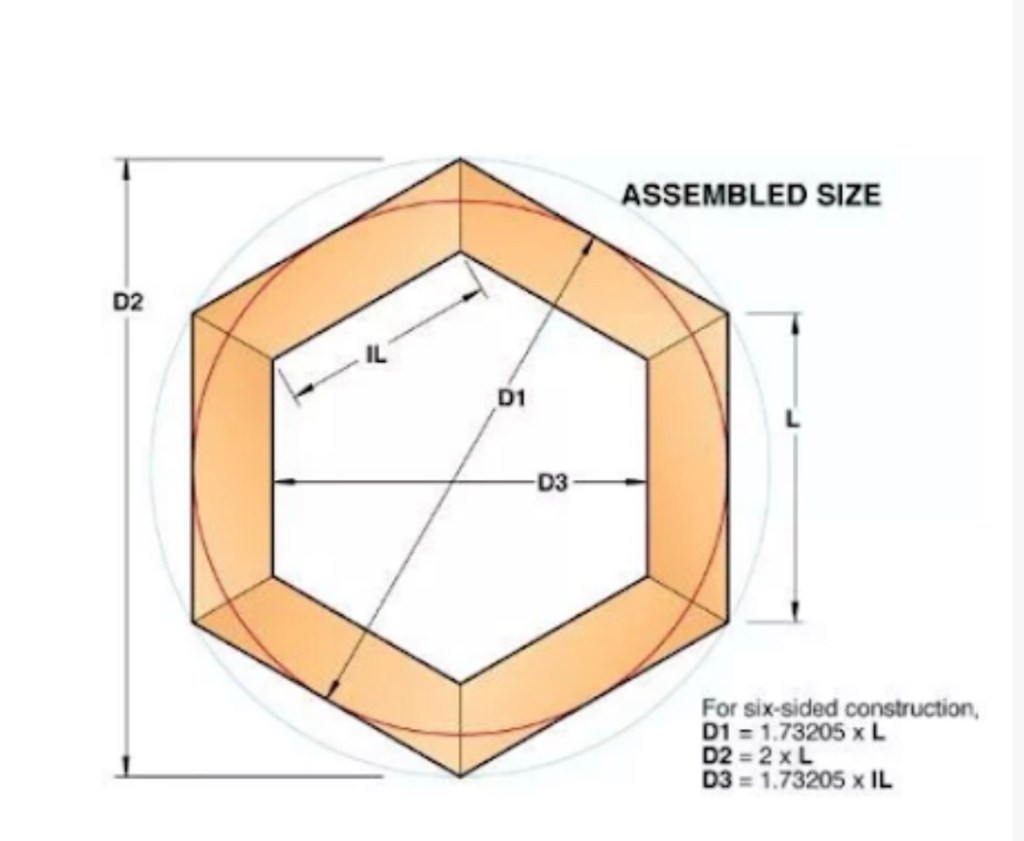
The number of staves The angle of each cut (miter) The bevel on each edge The final diameter of the bucket

Get these wrong, and you’ll end up with gaps, twists, or a bucket that simply won’t come together.

Stave Configurations

The chart above shows typical configurations—how many staves to use, along with the required miter and bevel angles.

More staves = a rounder bucket

Fewer staves = a more polygonal shape

Want the Easy Route? (No Judgment)

If math isn’t your thing and you just want to get building, there are a couple of excellent online tools:

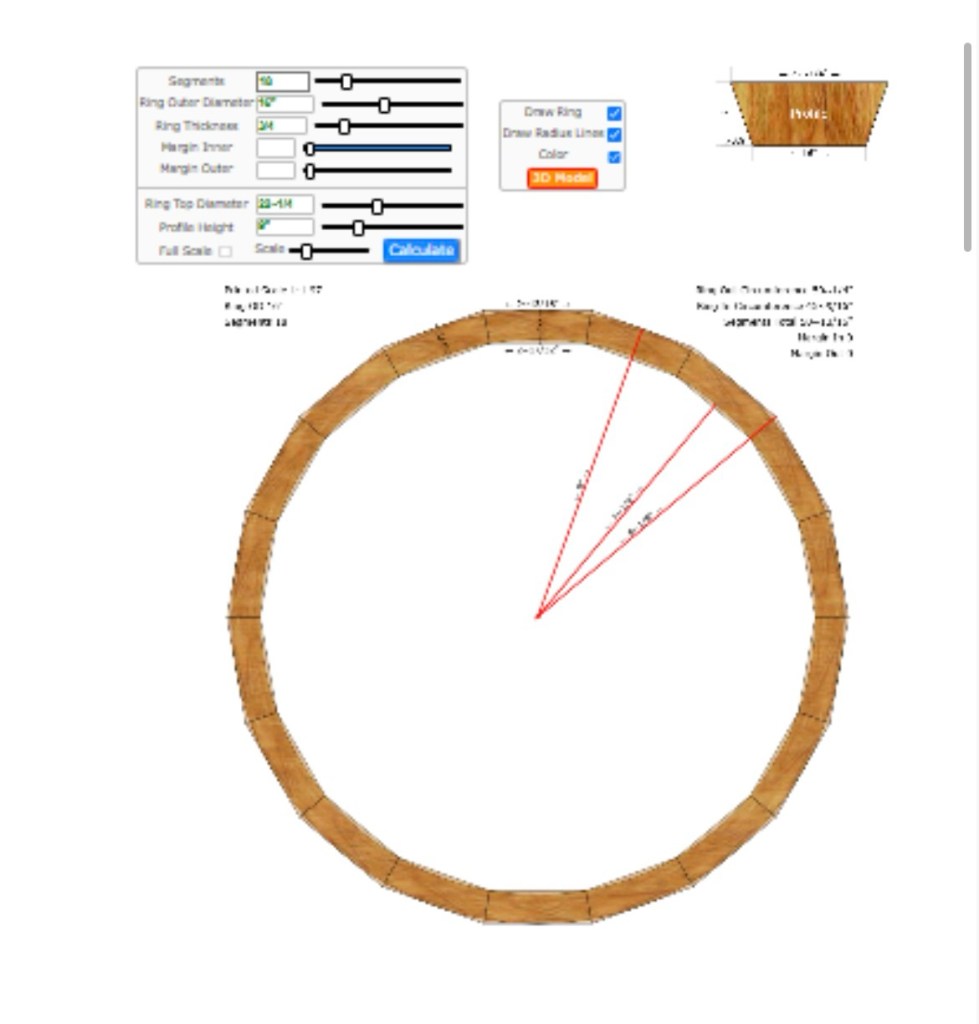
Blocklayer Stave Calculator Great visual tool with multiple views. You can see how your bucket will look before you cut anything—and even export a PDF.

Stave math made easy

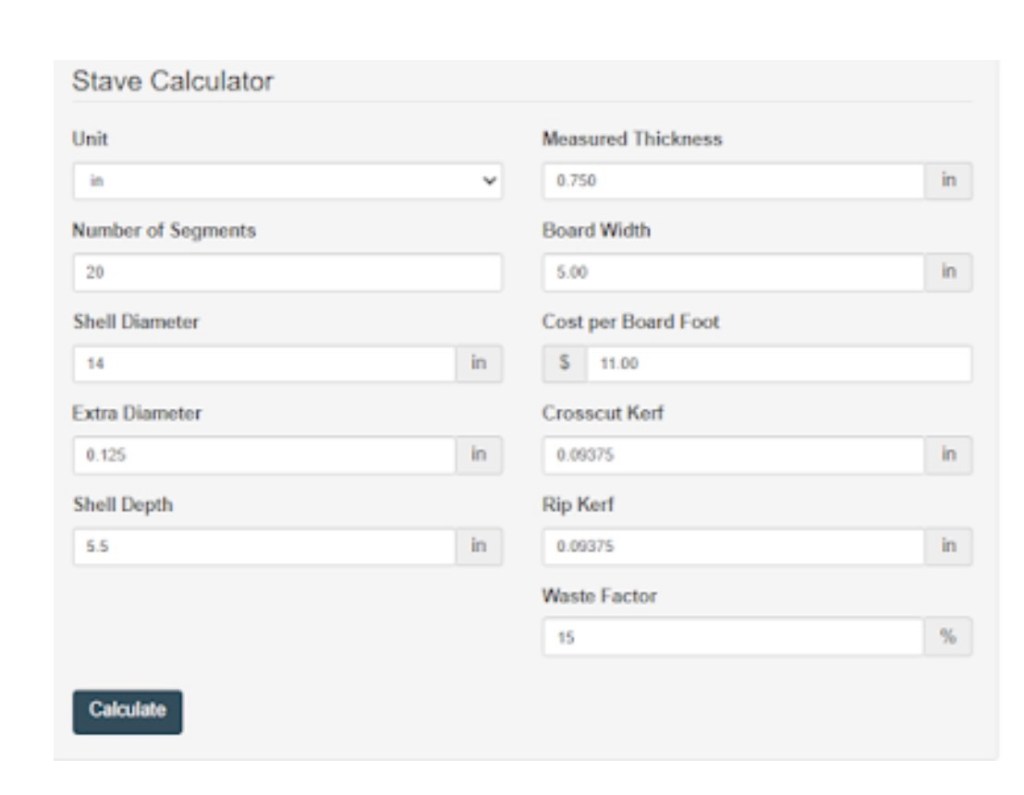
UnionTown Labs Calculator Originally designed for drum making, but the geometry is nearly identical. A standout feature is the ability to estimate material costs—useful if you’re thinking about commissions.

Takes some finessessing to get it 100%

These tools take the guesswork out and let you focus on the craft.

Want to Understand the “Why”?

If you’re like me and eventually want to understand what’s actually happening behind the scenes, then it’s worth diving into the math.

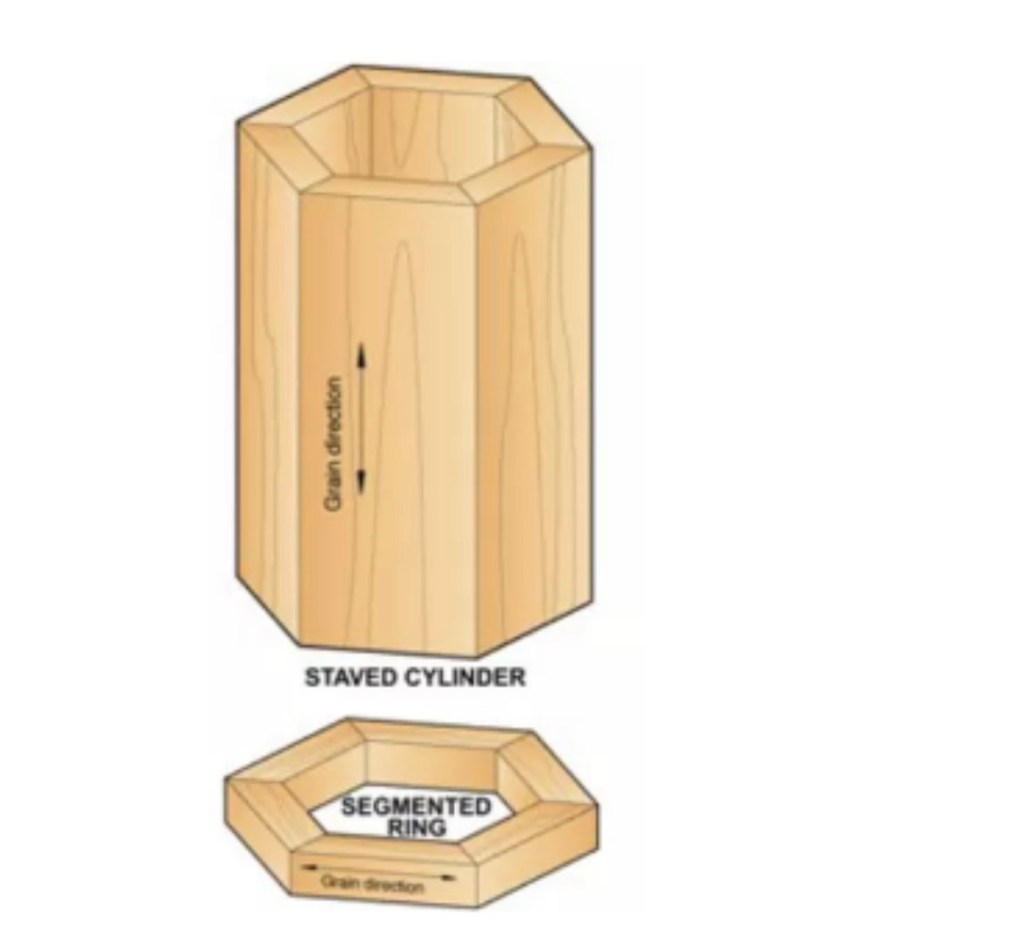
A good place to start is Wood Magazine, which has solid breakdowns on stave geometry and segmented construction.

At its core, you’re working with circles divided into equal parts:

Each stave represents a segment of a circle The angle of each cut is based on dividing 360° by the number of staves Precision is everything—small errors multiply quickly

Final Thoughts

Whether you:

Calculate everything by hand Use online tools Or just trial-and-error your way through it

…you’ll eventually land on what works.

I’m still learning, still adjusting, and still occasionally scratching my head over angles—but every bucket gets better.

And yeah… turns out math is a life skill after all.

Disclaimer: This blog is a place to document my projects, experiments, and lessons learned. I’m a craftsman first, not a writer—but I share in the hope that others find it useful or inspiring.

Modern Barrel making

Most of this blog is dedicated to reproducing crafts from the Viking Age through to the Renaissance. Along the way, I’ve been digging into both historical sources and modern practices, and recently I came across a couple of excellent resources that show how barrels are made today.

What’s fascinating is just how little the core process has changed. Coopering—whether for a small bucket or a large cask—still follows the same fundamental steps: shaping staves, raising the vessel, setting the hoops, and fitting the head. In many ways, the process we see today would be recognizable to a medieval cooper. While modern technology—especially computer-guided cutting and powered tools—has made parts of the work faster and more consistent, the underlying craft remains remarkably intact.

One resource worth exploring is the Modern Wine Barrel construction Lodi Wine California website, which walks through modern wine barrel construction. Some steps clearly reflect contemporary production methods, but if you read between the lines, you can still see the historical process at work. For example, their method of assembling the barrel heads offers useful insight for anyone looking to recreate period-accurate techniques for buckets or smaller vessels.

Another standout is The Cooperage – Saury. This beautifully presented site uses images and short descriptions to guide you from the forest all the way through to the finished barrel. It’s an excellent “big picture” overview of the craft—almost like visual cliff notes—and a great way to understand the sequence of operations before diving deeper into historical reconstruction.

For anyone interested in recreating medieval or Viking-era vessels, these modern examples are more than just educational—they’re a reminder that traditional crafts often survive not as relics, but as living practices, quietly carrying centuries of knowledge forward.

Resources

Want to Learn More About Coopering?

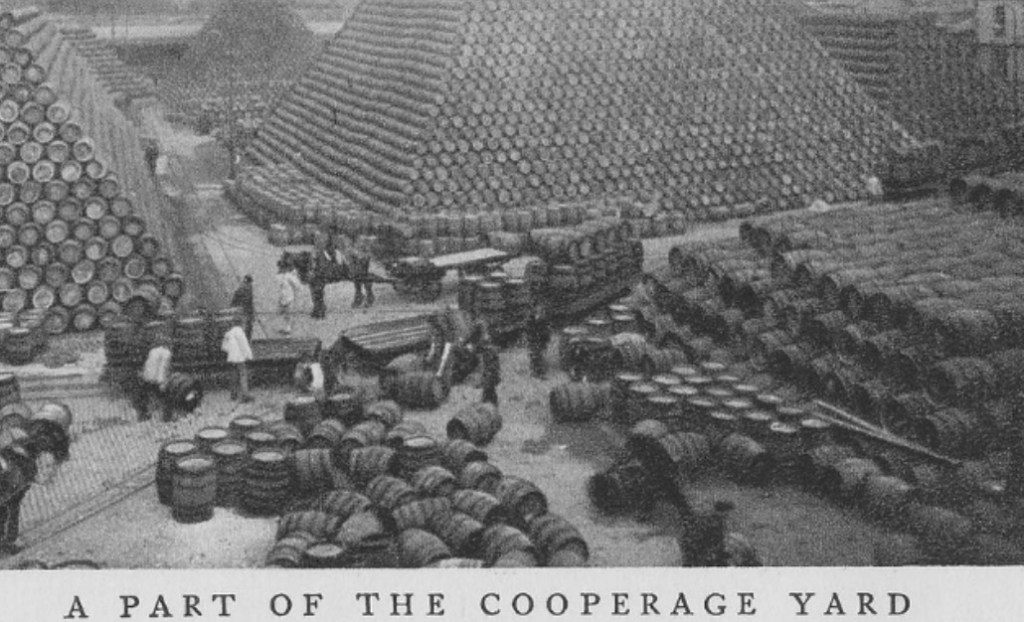
Just a few barrels

Looking for more information on the history of coopering, tools of the trade, construction methods, archaeological finds, videos, books, and more?

I’ve put together what I hope is a one-stop shop for all things coopering. This list is updated occasionally as I continue my own journey—so if you have suggestions, please leave a comment below.

Articles & Papers

Coopers, Hoop Makers and Benders (1921) The Cooper from the 17th to 19th Century The Newfoundland Cooper Trade Coopers – Raymond R. Townsend Change and Diversity Within Traditional Cooperage Technology

Blogs & Craft Writing

Making the Mary Rose Tankard The Ancient Stave Bucket Making Barrels & Vessels Coopers Were Crucial Craftsmen A Mary Rose Leather Bucket Stave Construction Lost Art Press The Period Transport of Liquids

Archaeology & Documented Finds

Two Wooden English Tankards from the 1500s Produce, Repair, Reuse, Adapt, and Recycle: The Multiple Biographies of a Roman Barrel The Wreck of the William Salthouse (1841) – Early trade between Canada and Australia Barrel Origins Artefacts – Not English Viking Age – Buckets & Barrels by Region

Film & Video

Cooperage (Canadian documentary, 1976 – still searching for a full copy) Master Cooper | First-Class Techniques Marshall Scheetz – Buckets, Mini-Cask, New Cooperage Traditional Cooper – George Smithwick Coopering a 36-Gallon Barrel Survivor Library 5th Generation Master Cooper Making Medieval Wooden Buckets The Art of Cooperage at Nephin Whiskey

🛠 Tools of the Trade

Cooper’s Tool Museum Cooper’s Tools of the Trade Cooper’s Tools – by Cindy Lambert

Books

Here are a few standout titles worth adding to any cooper’s library:

⭐⭐⭐⭐⭐ – Consider this the book on coopering

Title: The Cooper and His Trade

Author: Kenneth Kirby

Publisher: Linden Publishing, 1990

ISBN: 978-0-941936-16-3

⭐⭐⭐⭐⭐

Title: How to Make a Coopered Wooden Bucket: Beginner’s Guide

Author: James D. Gaster

Publisher: WinePress Publishing, 2004

ISBN: 1579217982

Title: The Village Cooper

Author: Kenneth Kirby

Publisher: Infinity Publishing, 2016

ISBN: 9780852633922

Title: How to Make Coopering Tools: A Guide for the Hand Cooper

Author: David Salvetti

Publisher: Infinity Publishing, 2016

ISBN: 9781495812521

Final Note

This collection reflects both historical research and practical craft resources—everything from academic studies to hands-on instruction.

I’ll continue to expand this list as I learn more, build more, and (inevitably) make more mistakes along the way.

If you’ve come across something worth adding—articles, books, videos, or tools—I’d genuinely appreciate you sharing it.

Lesson 5

Buckets in the Wild – Pirate Festival Reflections

Every year, I take part in the annual Pirate Festival in Guelph, Ontario, where I sell wooden and metal tankards.

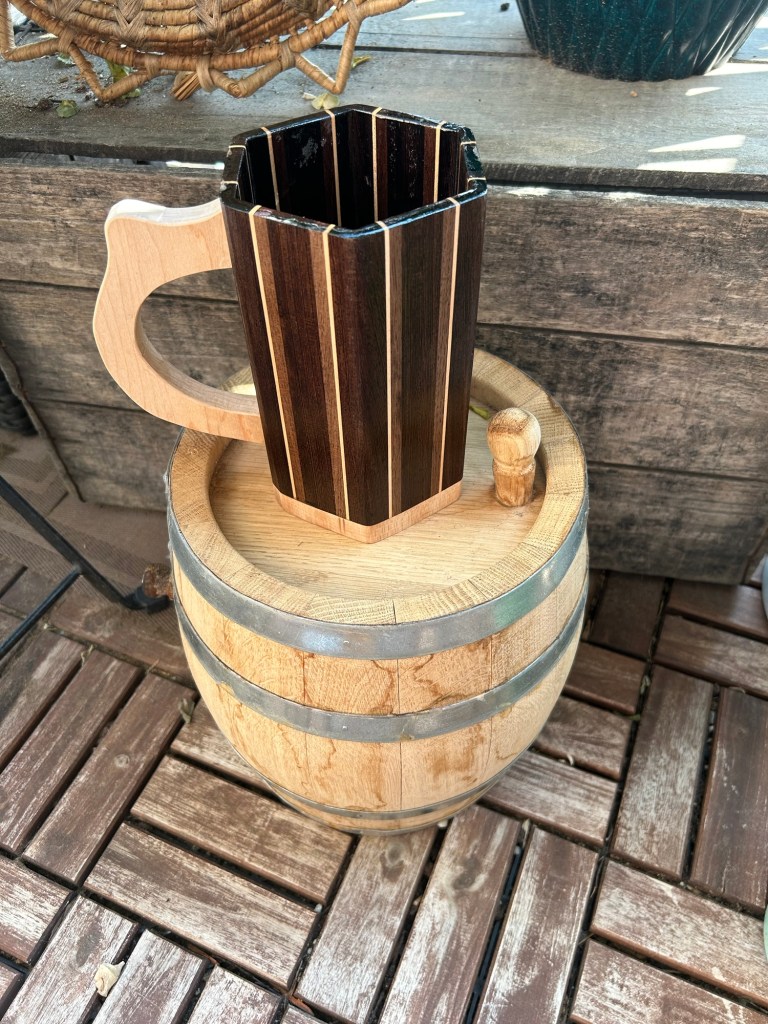
Built the tankard, acquired barrel

This year, I was especially excited to bring along some of the fruits of my labour… buckets.

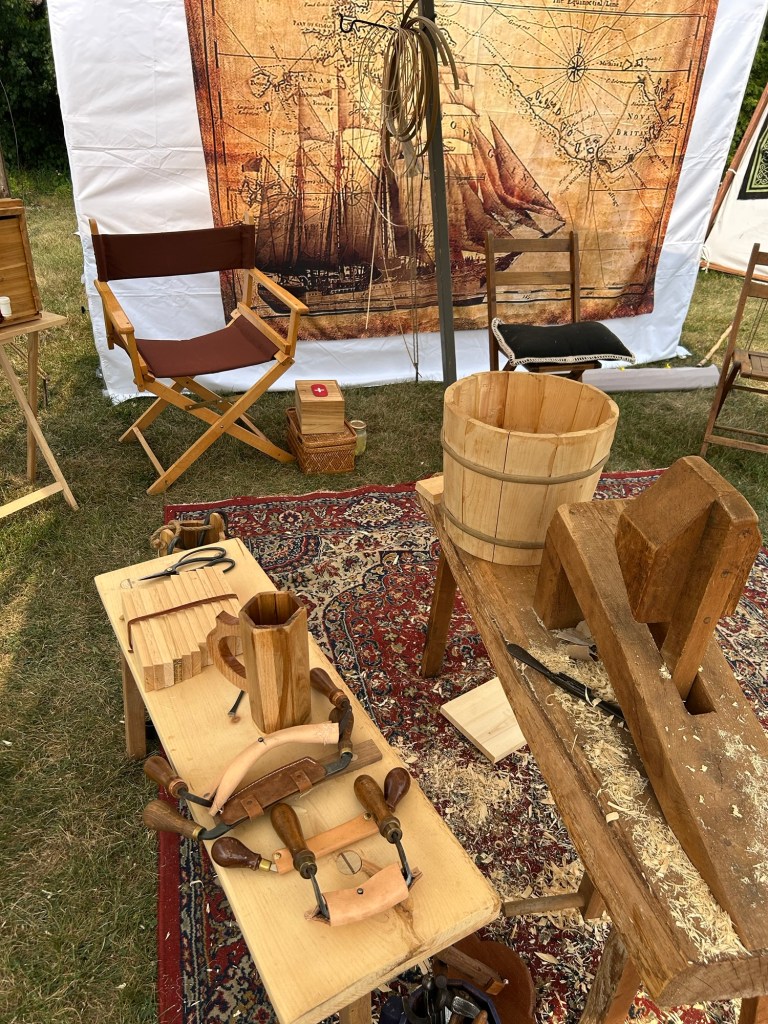
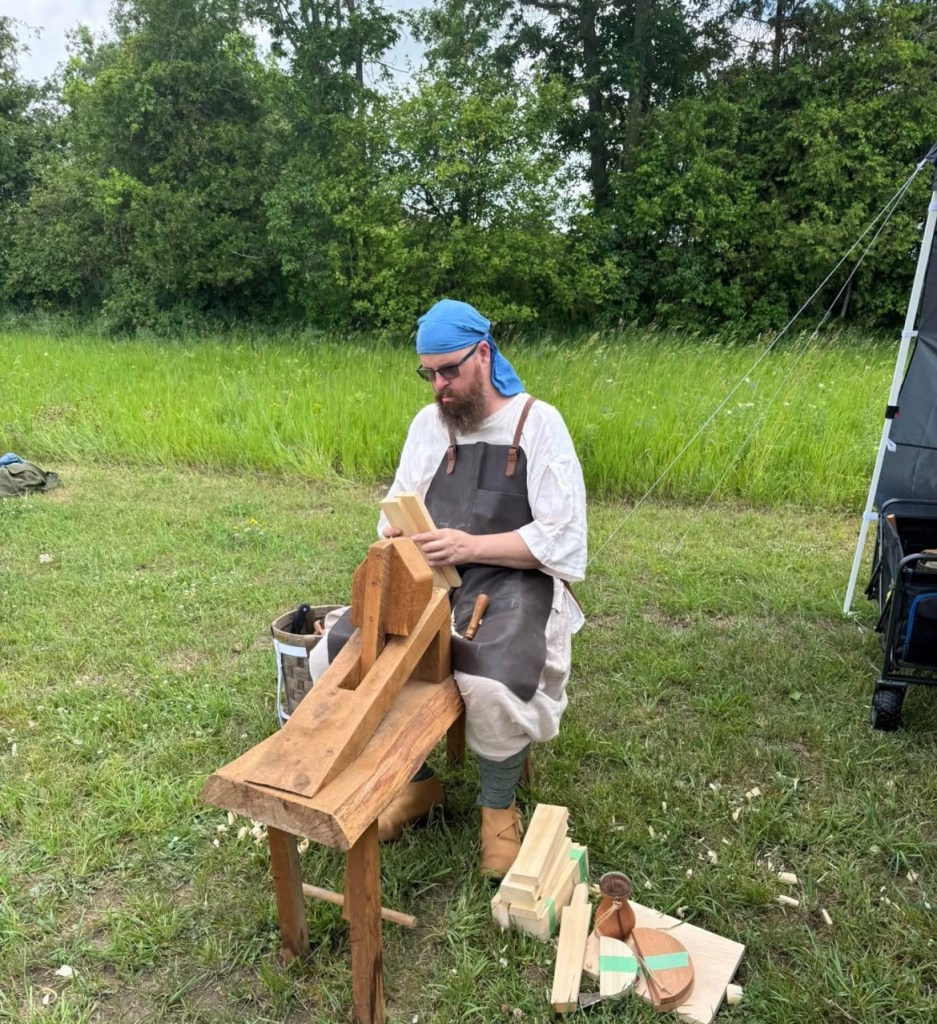
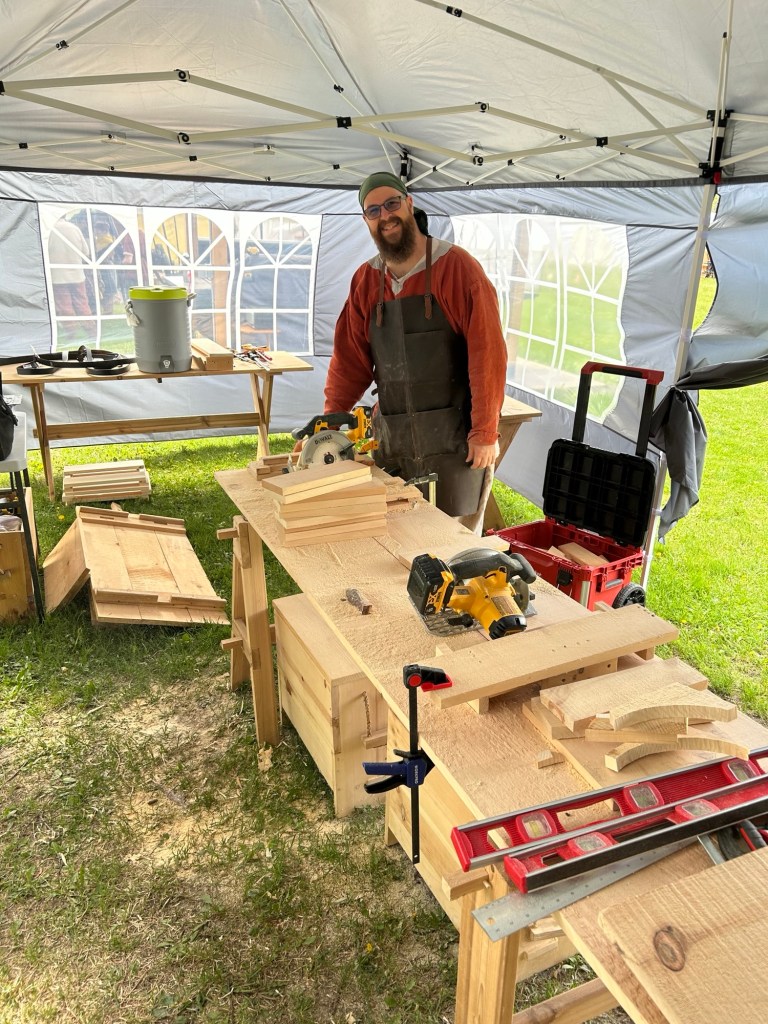
Alongside my wares, I set up my shave horse and a partially completed bucket so I could work while talking to visitors about the history of coopering—from the Viking Age through to the Golden Age of Piracy.

A Bucket as a Conversation Starter

The bucket I brought was made from twelve staves, glued together with two temporary wooden hoops. It was enough of a recognizable shape to spark curiosity—and that’s exactly what it did.

When speaking with children, I’ve found the best approach is simple: show them the object, then ask what they think it is—and what might be missing.

From there, the conversation builds naturally. I explain how the bottom (the “head”) is made and how it will eventually be pushed into place… and pop!—locking everything together.

The questions that followed were fantastic:

Where does the wood come from? Why use twelve staves? How do the tools work? Will you finish it today?

Cooper setup at Ontario Pirate Festival

A Perfect Interaction

My favourite moment of the weekend came from a young girl—maybe six years old—who walked into the tent with complete confidence and asked:

“What are you making?”

I replied, “Do you want the short version or the long version?”

She paused, looked around at the tools, the wood shavings, the shave horse… then back at me.

“Short,” she said.

I told her, “I use all of this to make wooden buckets.”

She nodded thoughtfully, thanked me for my time, and wandered off.

Perfect.

Unexpected Interest

I was also pleasantly surprised by the level of interest from teenagers and post-secondary students. Many wanted to go deeper—asking about origins, from prehistoric containers through the Viking Age, into the 1800s, and eventually the Industrial Revolution.

A Hard Lesson Learned

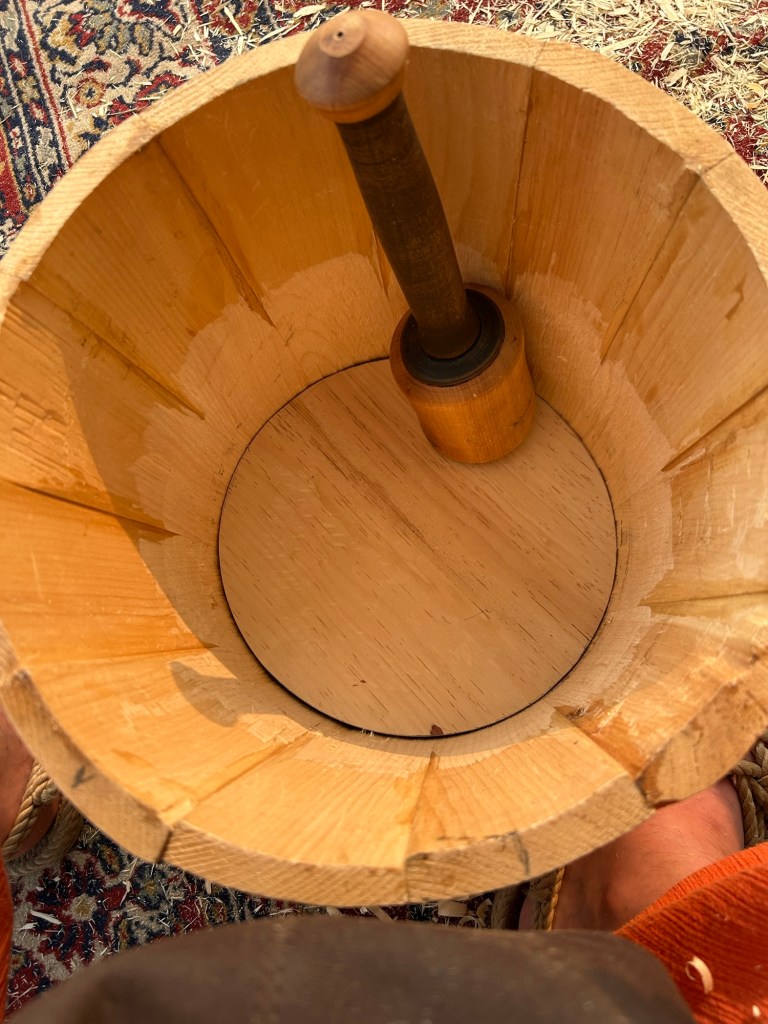
Image: Working the head into the bucket

It took me the entire weekend to get the bucket head seated into the croze.

Having already made a few buckets by hand, I couldn’t understand why this one was fighting me so much—until it finally clicked.

I had glued the staves together and added temporary hoops ahead of time so the bucket would look more complete for demonstrations.

That decision made the structure too rigid.

Instead of flexing slightly to allow the head to slide into place, the bucket resisted completely. To compensate, I had to remove far more material from the inside staves than expected just to get the head to fit.

The Payoff

The bottom of a bucket is called the “Head”

In the end, I did manage to get the head in—and was rewarded with that deeply satisfying pop as it locked into place.

It won’t be a watertight bucket, but that’s alright. The lessons learned here are far more valuable, and they’ll carry directly into the next build.

Since then, I’ve commissioned a blacksmith to create proper metal set hoops. These will not only improve the build process but also make for better, more accurate demonstrations in the future.

Hoop Terminology in Coopering

Traditionally, coopers used a sequence of hoops during construction:

Set Hoop (or Runner) The first hoop applied—used to bring the initial staves together. While historical naming isn’t well documented, “set hoop” is a commonly used modern term. This hoop is often temporary. Chime (or Head Hoop) Placed near the base after the head is fitted securely into the croze. Top Hoop Added near the rim to stabilize and level the structure.

Archaeological finds from the Viking Age show buckets constructed with anywhere from three to six or more hoops, depending on their purpose and construction style.

Final Thoughts

This weekend reinforced something I keep learning over and over:

Every bucket teaches you something.

Sometimes it’s about tools. Sometimes it’s about process. And sometimes, it’s about what not to do next time.

Lesson 4

I recently headed out to an Society for Creative Anachronism event—Trillium War, held near Hastings, Ontario—for a weekend of camping and teaching the basics of stave bucket construction.

Between running the lesson and coaching students on tool use, I took time to develop my own skills—particularly with a curved drawknife, a recent addition to my kit.

Preparing the Staves

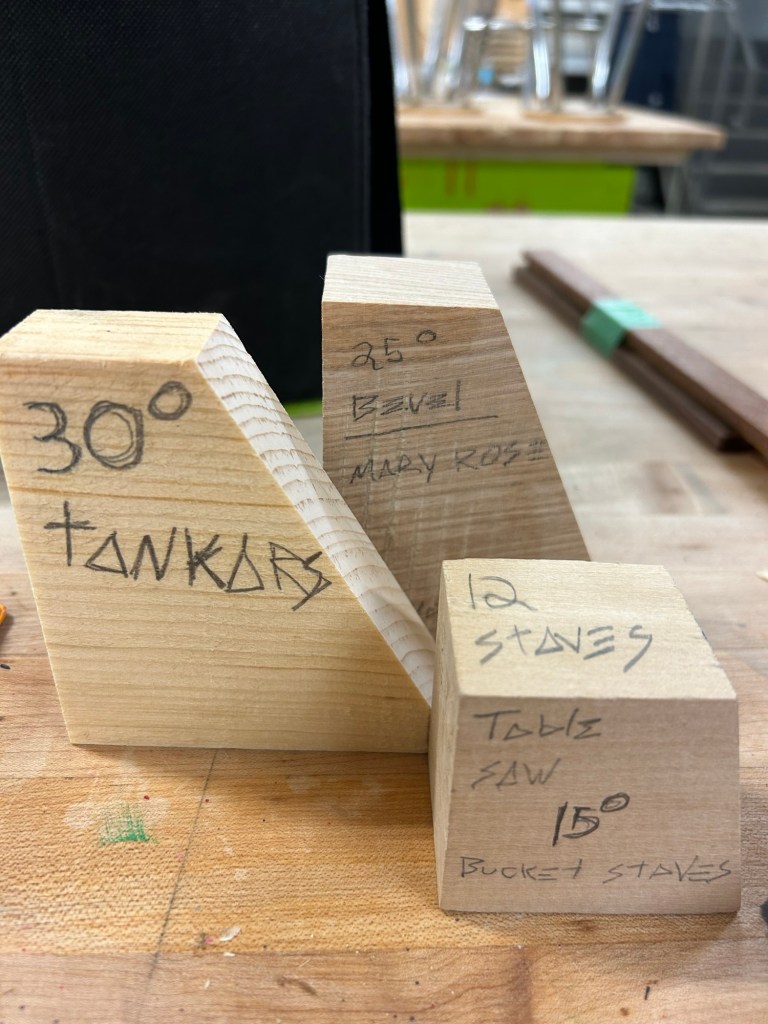
Before arriving, I had already cut twelve pine staves using a 15-degree miter and taper with shop-built jigs. Completing this step on a table saw ensured tight, consistent joints along the vertical edges—critical for achieving a watertight seal.

Shaping the exterior

Checking stave tightness

In this stage, the stave is held in place using a German-style block-head shave horse, with material being removed from the interior.

The curved drawknife—while slightly oversized for this task—performed well, especially in shaping the inner curve of the bucket.

The shave horse itself proved invaluable. That said, I’m considering modifying it. Replacing the block head with a simple bar (more in line with a traditional English-style shave horse) would likely make it more versatile for a wider range of work.

Repetition and Grain Challenges

After repeating the process across all twelve staves, I was pleased to see a noticeable improvement: the interior shape of the bucket was much rounder compared to earlier builds, which tended to be more angular.

Only one stave presented an issue, with erratic grain running in multiple directions. It was suggested this may have been caused by a branch growing through that section of the tree.

To keep everything aligned for reassembly, I numbered each stave—especially important since the bucket would need to be taken apart again later.

Assembly and Improvisation

Traditionally, once the staves are assembled, a temporary metal hoop is driven onto the outside of the bucket to apply even pressure and hold everything tight.

Without a metal hoop available, I once again used a leather belt—and it worked surprisingly well. To tighten it, I used a small wooden hoop driver I made from mahogany, trying to stay as close as possible to historical methods.

Croze Work (and Limitations)

Historically, the next step would involve using a howel plane (sometimes called a “howler”) in a circular motion to smooth the interior and prepare for the croze.

I don’t yet own—or haven’t yet made—a howel plane, though it’s high on my to-do list.

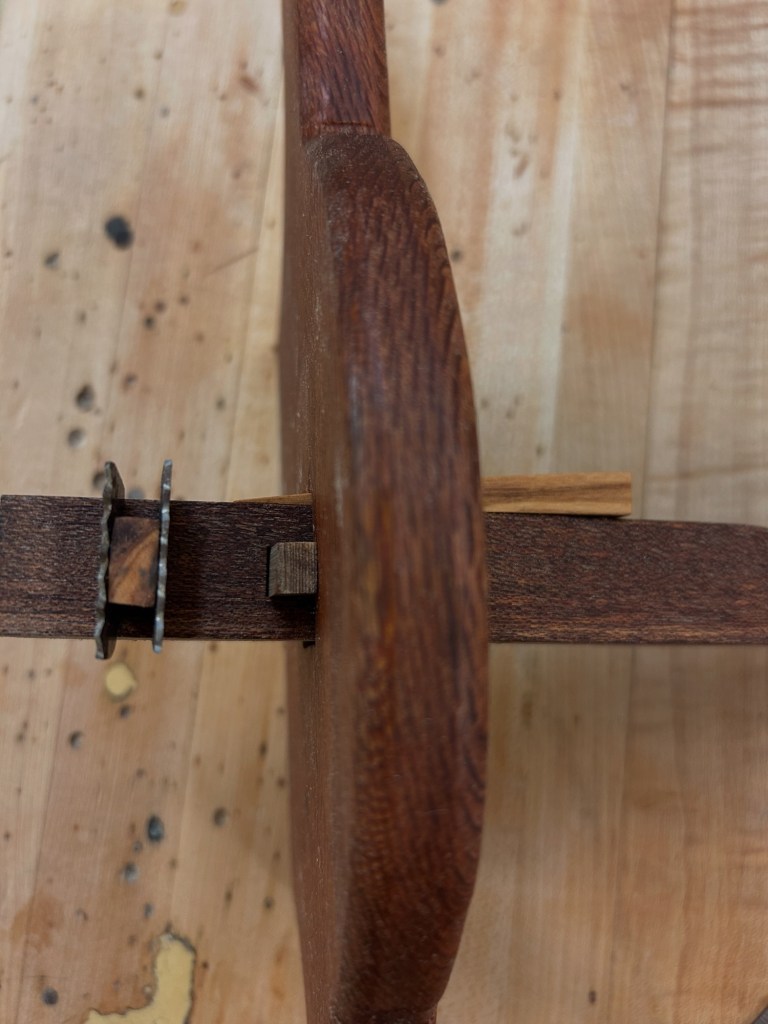
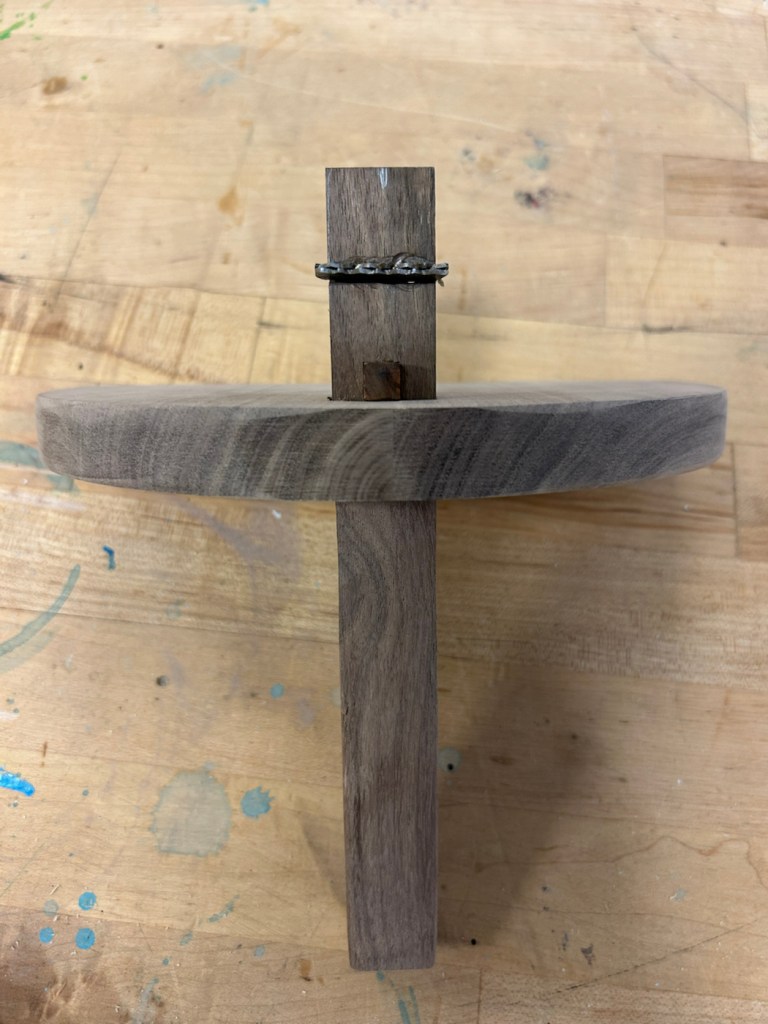
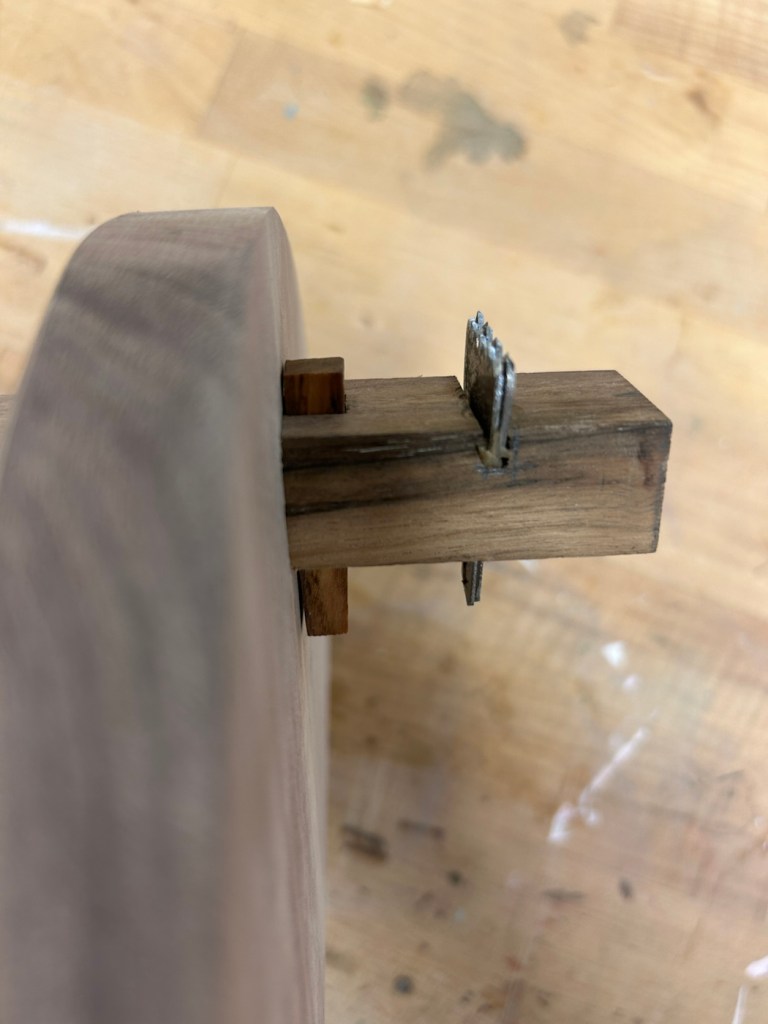
Instead, I used my Post Pillar Croze to mark where the head (the bottom of the bucket) would sit. At this stage, however, the tool was still only scoring two parallel lines rather than removing material as a traditional croze would.

Post Pillar Croze

Because of this, I had to disassemble the bucket and chisel a ¼” groove into each stave individually to fit the head.

Time vs. Technique

Once the grooves were cut, the bucket was reassembled.

This process—taking the bucket apart, chiseling each stave, and putting it back together—was extremely time-consuming.

Improving the croze is now a priority. A properly functioning tool that cuts a clean, consistent groove in one pass would not only save time but also bring the process closer to true historical practice.

Ongoing Lessons

Each build continues to highlight the balance between historical accuracy and practical limitations.

For now, I’m working with what I have—modern tools where needed, hand tools where possible, and constant iteration in between.

The goal remains the same: tighter joints, better flow, and tools that do the job the way they were meant to.

Disclaimer: This blog is a place to document my projects, experiments, and lessons learned. I’m a craftsman first, not a writer—but I share in the hope that others find it useful or inspiring.

Lesson 3

My Bucket Journey – Hybrid Learning

My bucket-making journey has always been a hybrid learning process—combining historical methods, hand tools, and the realities of working in a modern shop.

As I continue to build up my collection of traditional tools, I rely on modern power tools to bridge the gap. The current set of jigs I’m using were all made with modern equipment. The process outlined here begins after the staves have already been cut into straight-sided planks and the croze has been completed.

Lessons from the Jigs

After several test runs, the jigs proved capable of producing tight edges with bevels that have the potential to create a watertight (wet) bucket.

The most important lesson:

Start with enough width on your initial stave cut.

If too much material is removed on the first pass, you won’t achieve a tight bevel on the opposite side. While this isn’t a major issue for a dry bucket, it becomes critical if your goal is a watertight vessel—tight seams all the way around are essential.

Cutting blocks for cutting staves

Learning Without a Lineage

Historically, an apprentice cooper would spend 5–7 years learning the trade—often making their own tools before ever attempting a full bucket or barrel. Working entirely with hand tools, they developed the ability to diagnose and correct problems using nothing more than their hands and eyes.

From the medieval ages to modern day he craft was passed down through guilds and families. I genuinely believe that even today, there are aspects of coopering that haven’t made their way onto the internet. Some knowledge still lives only within the hands of those who practice it.

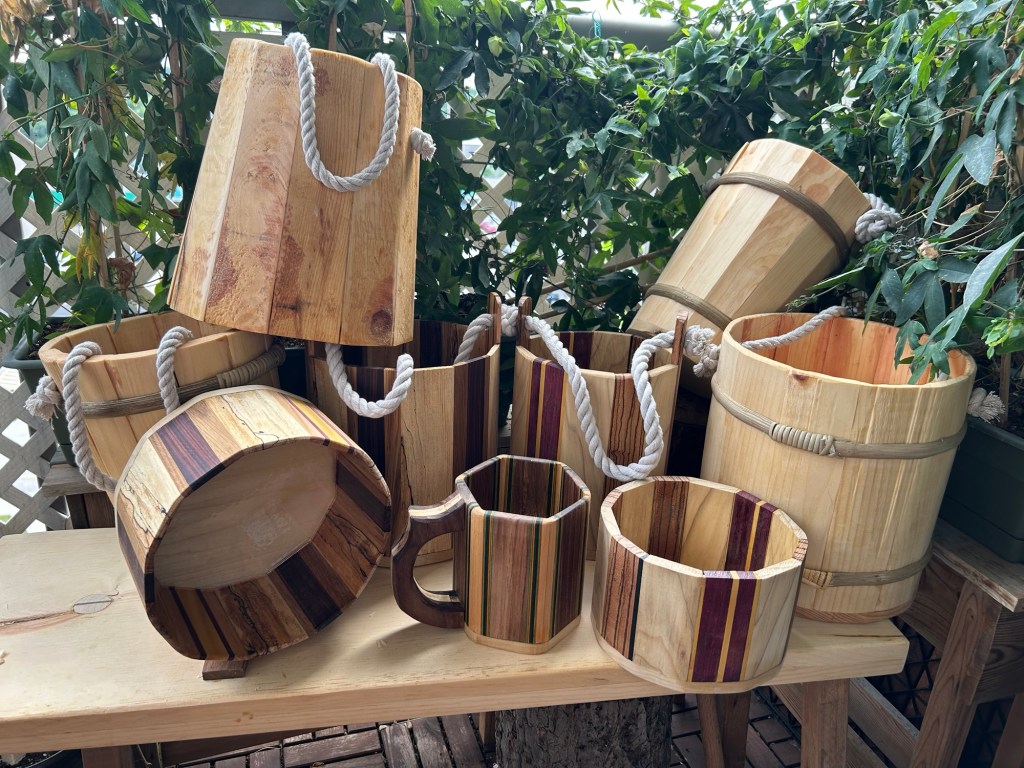
Various wet stave vessels

Assembly

To bring the bucket together, I rolled the staves around the head and used packing tape as a temporary clamp. Historically, coopers would use wooden or metal hoops at this stage. Working backward from modern methods, fabricating proper metal hoops is high on my list—fortunately, I know a couple of blacksmiths who may be able to help.

Fit and Challenges

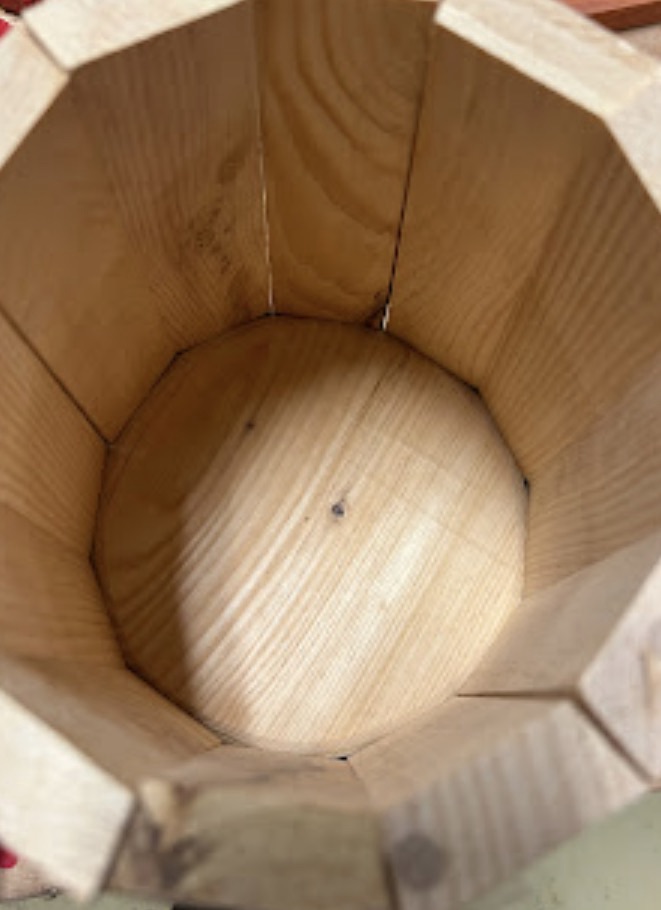
Looking down into the bucket, you can see that while some staves fit tightly, others leave gaps. This could be due to several factors: the croze, the head, or the staves themselves.

Time was limited on this build, so I chose to glue it as-is and treat it as a learning piece. The goal is to identify and correct these issues in the next iteration.

The Result: A Firkin

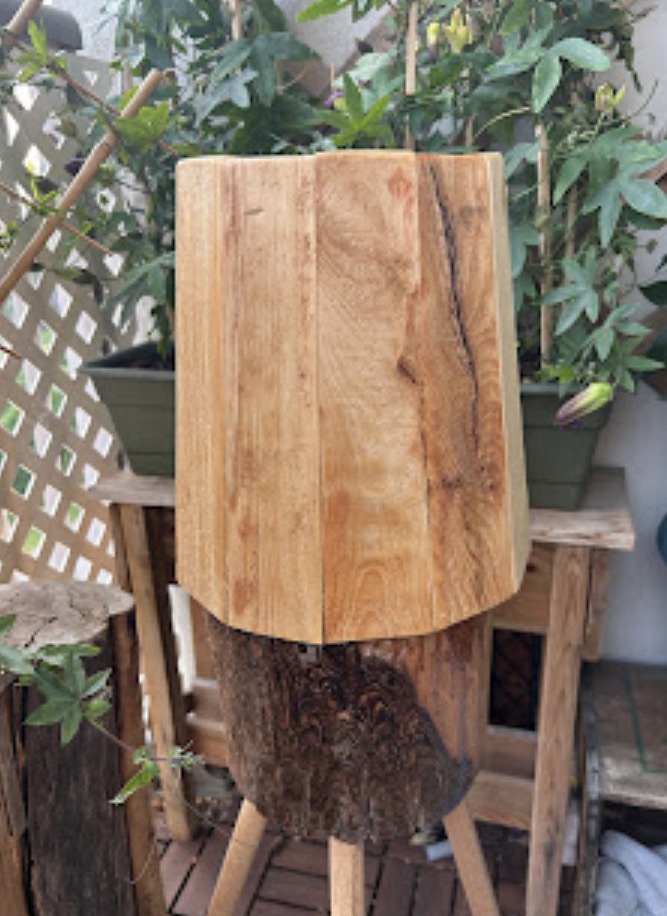
This bucket ended up narrower at the top and wider at the bottom—a shape known as a firkin.

Traditionally, firkins were used to store and transport goods such as beer, butter, or fish. They are essentially a smaller form of a barrel, typically holding about a quarter of a barrel’s volume.

The finished piece has been sealed on the outside with a beeswax and linseed oil wax blend. The current plan is to apply epoxy to the interior to fill any gaps and make it watertight. A lid may or may not be added later.

Final Thoughts

Each bucket teaches something new. This one highlighted the importance of stave preparation, precision in bevels, and the limits of my current tooling.

Step by step, I’m working toward tighter joins, better flow, and a deeper understanding of the craft.

Disclaimer: This blog is a place to document my projects, experiments, and lessons learned. I’m a craftsman first, not a writer—but I share in the hope that others find it useful or inspiring.

Lesson 2

Medieval Bucket Making

Results from FOOL (Fruits of Our Labour)

During the weekend of May 17, 2025, I partnered with a friend to teach a bucket-making class in the field at an Society for Creative Anachronism event: FOOL (Fruits of Our Labour).

Over the course of two days, we worked with three students for a total of roughly eight hours. We began with a brief historical overview—tracing the bucket from its earliest known forms through to the 1800s, when its everyday use began to decline. From there, we walked through the full process of construction: first as it would have been done historically, and then how we’ve adapted those methods for modern learners who don’t have the benefit of a seven-year apprenticeship or the experience of a master cooper.

The Stave Jig

One of the key tools in our process is the stave jig, used to cut both the angle and bevel on each stave.

Designing this jig was a project in itself—it took nearly eight hours and several iterations to get to a workable version.

Note: The jig still needs refinement. The fit isn’t yet tight enough to consistently produce staves suitable for a watertight (wet) bucket. Improvements are already in progress.

Raising the Bucket

Once the staves are prepared, they are assembled to form the bucket walls. We quickly discovered that this step benefits greatly from extra hands. Having multiple people involved reduced frustration and made the process significantly smoother for students.

Improvising in the Field

Image: Buckets in jigs secured with belts

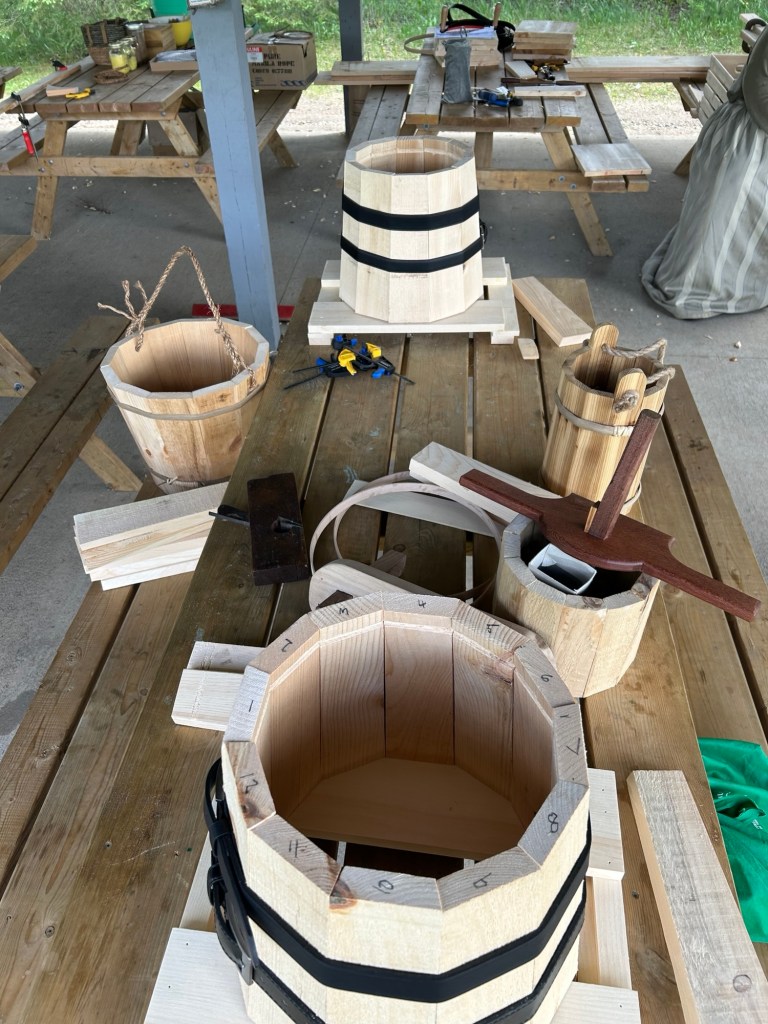
At lunch, with students away, we had four buckets sitting upside down in jigs, held together using leather belts.

Without metal hoops (yet), the belts proved to be an excellent substitute. They held the staves securely while still allowing for small adjustments—something rigid hoops don’t always permit at this stage.

The Most Time-Consuming Step

Image: Student carving head and bevel

Students then worked on shaping the bucket head—carving the inside and beveling the edges to fit into the croze.

This was, by far, the most time-intensive part of the process.

Finding a way to speed this up is a priority for future classes. That said, any shortcut will come at the cost of historical accuracy—these are precisely the kinds of skills a cooper would spend years mastering during apprenticeship.

Final Result

Image: Completed dry bucket with braided handle

The end result: a completed dry bucket, finished with a braided handle.

Reflections

This class was a valuable learning experience—not just for the students, but for us as instructors. From tool design to teaching flow, each step revealed opportunities for improvement.

We’re getting closer to a repeatable process that balances historical technique with practical accessibility.

More refinements—and better buckets—are on the way.

Disclaimer: This blog is a place to document my projects, experiments, and lessons learned. I’m a craftsman first, not a writer—but I share in the hope that others find it useful or inspiring.

Post Pillar Croze

From the pages of How to Make Coopering Tools, my first foray into toolmaking was the Pillar Post Croze.

Build Process

Completed Tool

The finished croze was built using hardwoods for strength and durability: olive wood for the wedges, zebrawood for the handles, and mahogany for the tenon.

Field Test

This tool saw its first real use at an Society for Creative Anachronism (SCA) event—FOOL—during a bucket-making class.

Overall, the tool held together structurally, which I consider a win for a first build. That said, there were a few challenges:

The metal blades loosened and fell out several times Rather than cutting a continuous groove like a traditional croze, it scored consistent lines around the bucket This required an extra chiseling step, which slowed things down for students The tool behaved more like a saw on each stave than a true croze It didn’t move smoothly in a circular motion around the bucket

I suspect part of the issue came from the bucket itself—the interior and exterior hadn’t been fully smoothed yet (tools for that are still on my list).

Final Thoughts

For a first attempt at toolmaking, I’d call this project a success. It worked, it taught me a lot, and it highlighted exactly where improvements are needed for the next version.

Disclaimer: This blog is a place to document my projects, ideas, and experiments. I’m here to learn and share—not to win any writing awards.