Medieval Bucket Making
Results from FOOL (Fruits of Our Labour)
During the weekend of May 17, 2025, I partnered with a friend to teach a bucket-making class in the field at an Society for Creative Anachronism event: FOOL (Fruits of Our Labour).
Over the course of two days, we worked with three students for a total of roughly eight hours. We began with a brief historical overview—tracing the bucket from its earliest known forms through to the 1800s, when its everyday use began to decline. From there, we walked through the full process of construction: first as it would have been done historically, and then how we’ve adapted those methods for modern learners who don’t have the benefit of a seven-year apprenticeship or the experience of a master cooper.
The Stave Jig
One of the key tools in our process is the stave jig, used to cut both the angle and bevel on each stave.
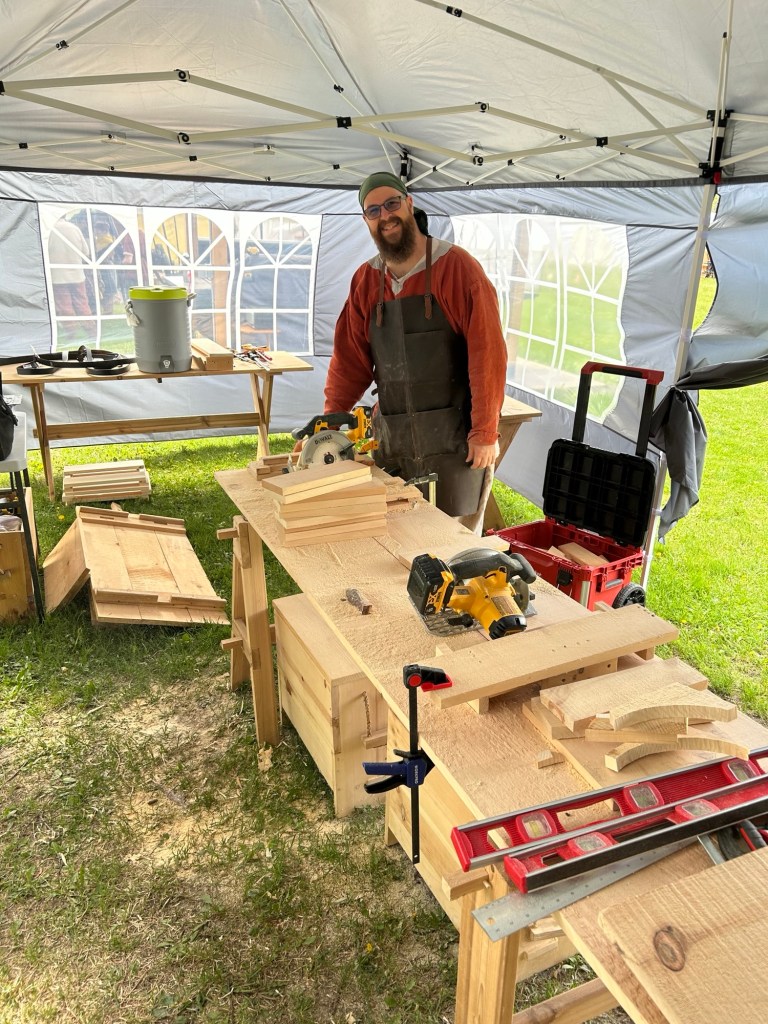
Designing this jig was a project in itself—it took nearly eight hours and several iterations to get to a workable version.
Note: The jig still needs refinement. The fit isn’t yet tight enough to consistently produce staves suitable for a watertight (wet) bucket. Improvements are already in progress.
Raising the Bucket
Once the staves are prepared, they are assembled to form the bucket walls. We quickly discovered that this step benefits greatly from extra hands. Having multiple people involved reduced frustration and made the process significantly smoother for students.
Improvising in the Field

Image: Buckets in jigs secured with belts
At lunch, with students away, we had four buckets sitting upside down in jigs, held together using leather belts.
Without metal hoops (yet), the belts proved to be an excellent substitute. They held the staves securely while still allowing for small adjustments—something rigid hoops don’t always permit at this stage.
The Most Time-Consuming Step
Image: Student carving head and bevel
Students then worked on shaping the bucket head—carving the inside and beveling the edges to fit into the croze.
This was, by far, the most time-intensive part of the process.
Finding a way to speed this up is a priority for future classes. That said, any shortcut will come at the cost of historical accuracy—these are precisely the kinds of skills a cooper would spend years mastering during apprenticeship.
Final Result
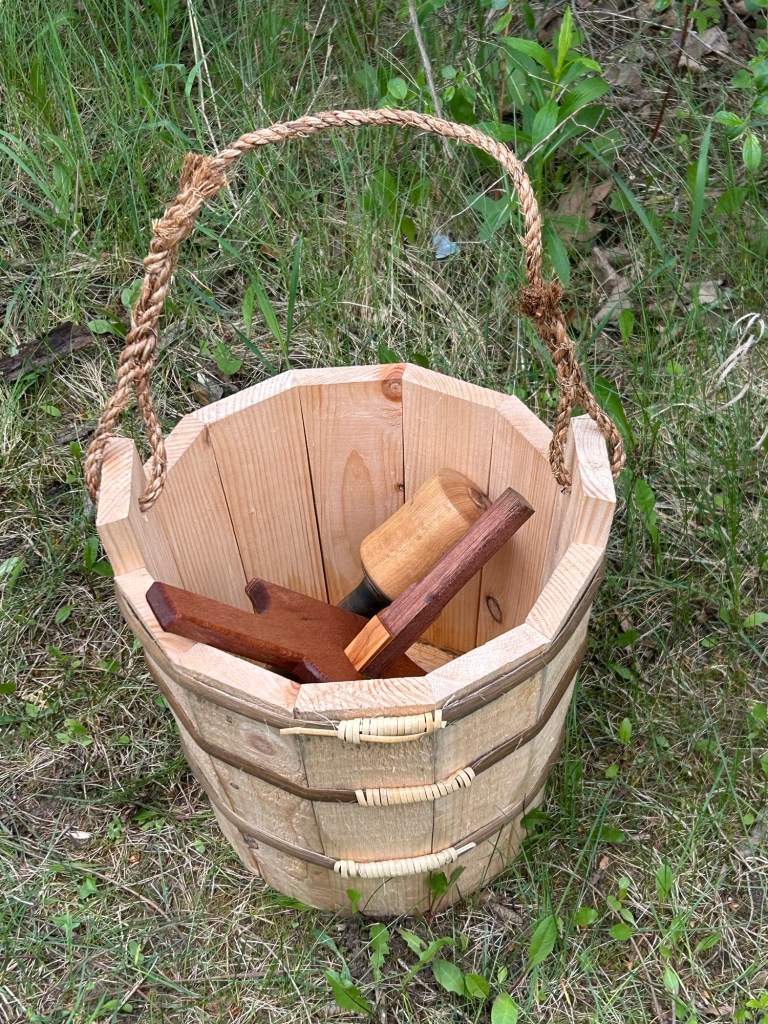
Image: Completed dry bucket with braided handle
The end result: a completed dry bucket, finished with a braided handle.
Reflections
This class was a valuable learning experience—not just for the students, but for us as instructors. From tool design to teaching flow, each step revealed opportunities for improvement.
We’re getting closer to a repeatable process that balances historical technique with practical accessibility.
More refinements—and better buckets—are on the way.
Disclaimer: This blog is a place to document my projects, experiments, and lessons learned. I’m a craftsman first, not a writer—but I share in the hope that others find it useful or inspiring.
